If you’re looking for a relatively easy way to identify Google ranking opportunities, with a tool that’s simple and free to use, then Google Search Console is what you’re looking for.
Google Search Console is a free tool from Google that offers simple and easy-to-understand reports on your website’s traffic and performance.
It doesn’t just show the number of visitors your website has but which search terms they used to find you. It also shows how many times your website was shown in the search results for a certain search term, which can be very useful.
Table of Contents
How do you find SEO quick wins on Google Search Console?
Google Search Console offers not only a non-technical, user-friendly way into your website data but a whole host of easy-to-use filters to allow you to quickly evaluate which pages are underperforming and search terms that offer great potential for growth. By combining the filters available, you can quickly identify high-volume search terms that your website could potentially rank for with just a little more focus on your SEO.
Setting Up A Google Search Console Account
To use Google Search Console, you’ll need a Google account to create the link to your website.
It’s all pretty simple, just follow these instructions. If I built your site, then don’t worry, you already have it set up and you should already have access.
If you’re having any issues connecting your account to your website, get in touch and I’ll see if I can help.
What You See When You First Log Into Google Search Console
Once logged in, you’ll be faced with the Dashboard.
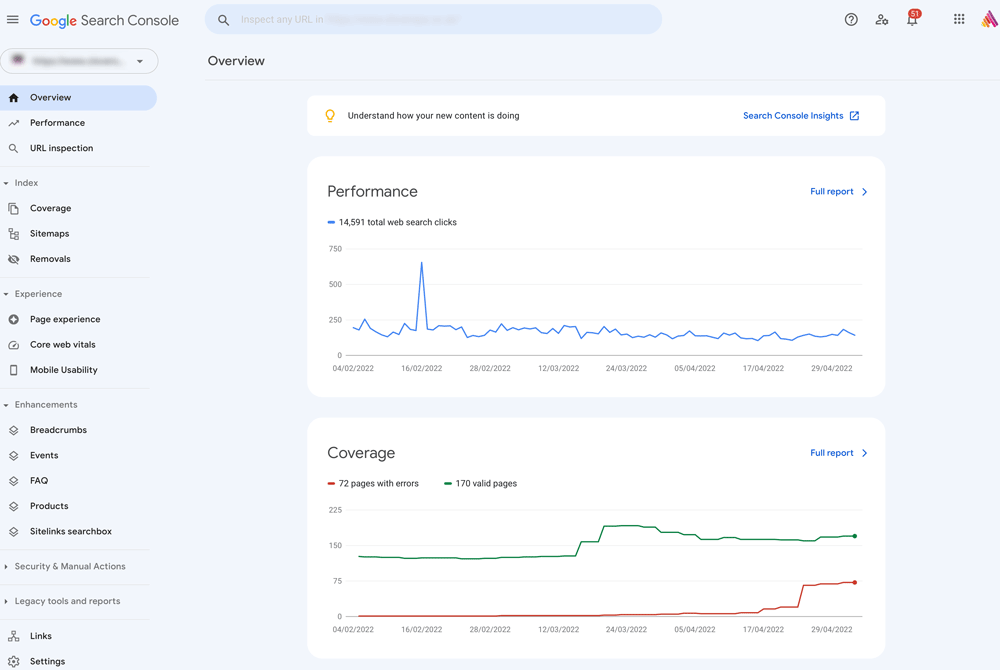
Google Search Console is a really power tool for local SEO and monitoring so many aspects of your website and there’s a great deal you can do using the tools on this page but today I’m going to focus primarily on the Performance tab and its filters.
To see the full Performance report, click on the Full Report link in the top right-hand corner of the Performance graph. This will take you to a more detailed report, with lots more information, options and filters that can be applied to the data to give you a greater understanding of what is and is not, working for your local SEO strategy.
Understanding The Google Search Console Performance Report
As you can see from the image below, there’s a lot of information available in this report.
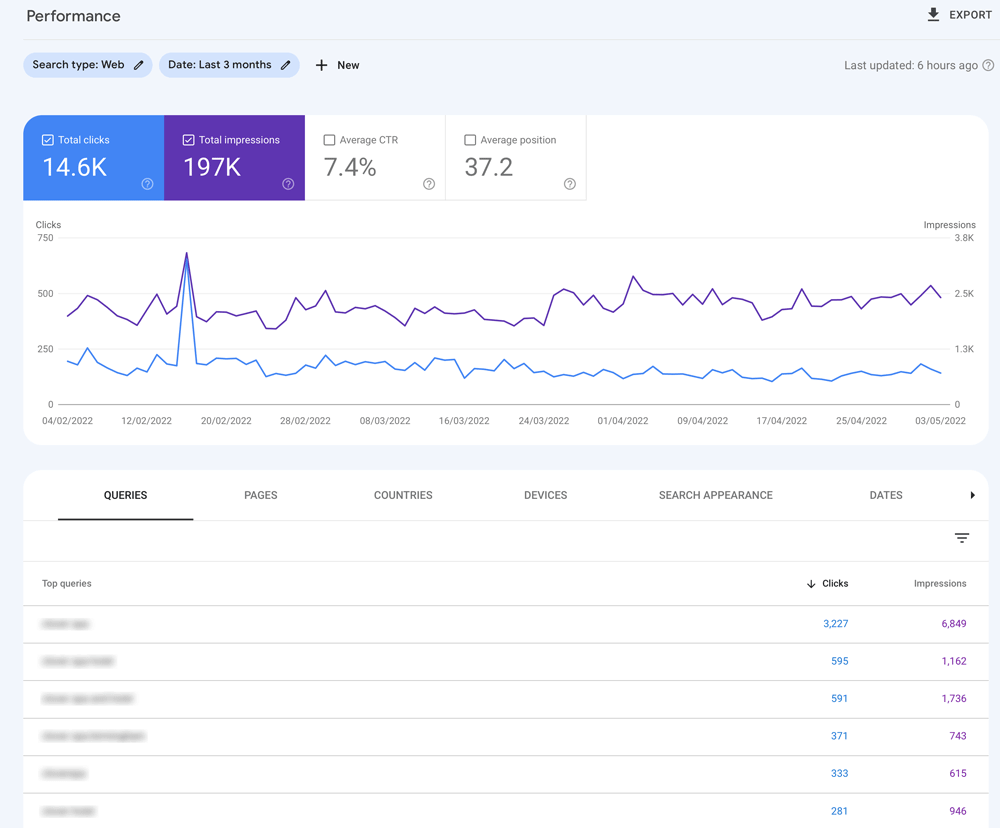
By default, the reports shows the following:
- Web results
- Last 3 months data
- Total clicks (for the last 3 months)
- Total impressions (for the last 3 months)
- Average CTR (Click Through Rate)
- Average position
In the table above the graph, the default tab is set to Queries, which shows the top search queries used to find your website via Google, sorted by Clicks.
If you’re wondering what the difference is between Clicks and Impressions, clicks are those times when someone clicked on your link in the search results for the search query, whereas impressions are the total amount of times your website appeared in the search results for that search term – even if the user didn’t click on your link.
An increasing number of impressions does, at least, demonstrate that your SEO work is beginning to pay off.
Beyond Google Search Console’s Default Settings
You can quickly and easily amend the default settings to show lots more useful SEO data just by clicking a few buttons, selecting some different tabs and, excitingly, applying a few filters.
Date Range
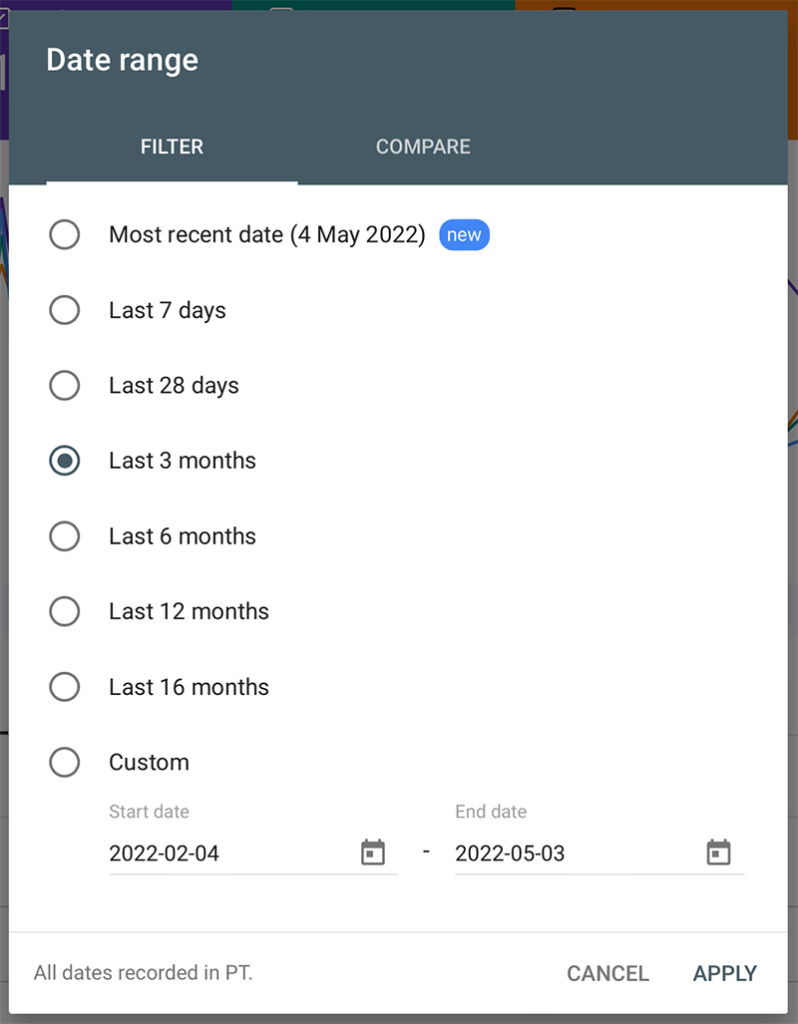
If you want to select a wider date range, for example, just click the pencil icon next to the Date: Last 3 months button to reveal a host of new date range options.
Average CTR and Average Position
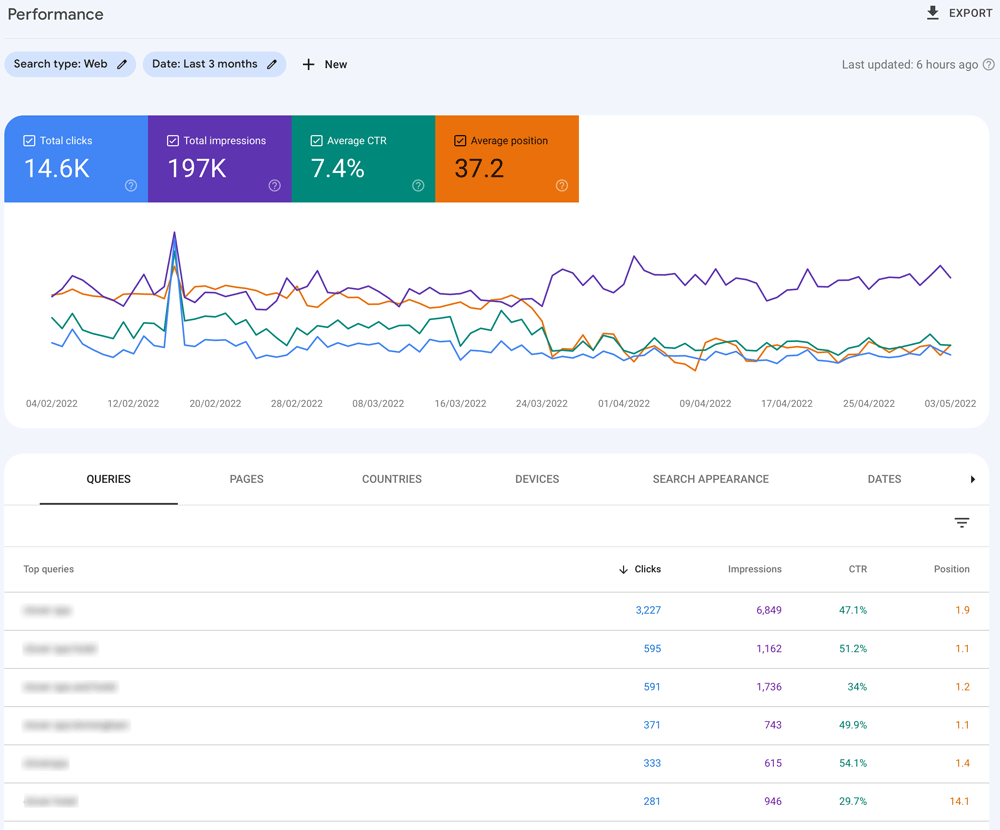
Clicking the checkboxes next to these options throws up some additional lines on the graph but, more interestingly, two additional columns of data in the table below.
Now you can not only see the clicks and impressions but also the CTR and Position for each of the queries that have brought up your website in the search results.
The table can be sorted by any one of these columns just by clicking on one of the headings.
Pages
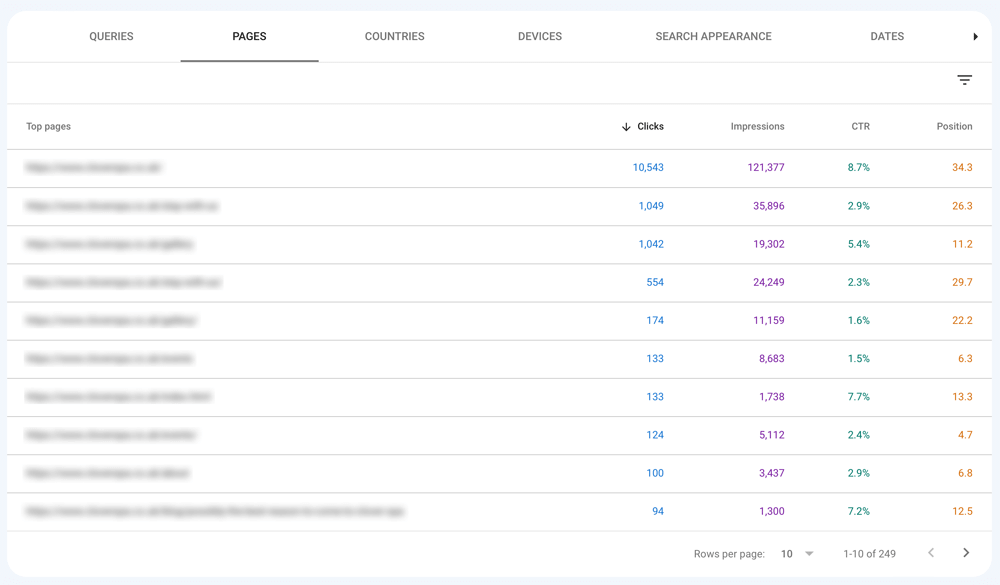
To view your top-performing pages, just click the PAGES link to see which of your pages are the most popular.
Explore the other tabs to see the following:
- Countries
- Devices
- Search Appearance
- Dates
Identifying Opportunities with Google Search Console
Now that you have an understanding of Performance Report and how to adjust the default settings, it’s time to move on to how we can use this really powerful tool to identify SEO opportunities to get our pages ranking higher by analysing the data.
By simply looking at the QUERIES tab, we can see what search terms are bringing in the most traffic. The default sorting is by most clicks.
Looking at this data – even in its default state – gives us a good understanding of which keywords are working well for us.
The higher the amount of QUERIES, the better the search term is working for your website.
However, by looking at the number of Impressions, we also know how many times your website appears in the search results for this particular term.
If the number of impressions is much higher than the clicks, then the CTR will be low:
CTR = Clicks / Impressions
The Position at which your website appears in the search results for this search query will be the biggest factor in understanding the CTR.
Generally, the better your position in the search results, the higher the CTR.

If the number of impressions is high, we at least know that there is interest in that search term and that the website ranks for it – whatever the position.
One of the best ways to identify search ranking opportunities is to use filter tools to analyse the data.
What Are Google Search Console Filters?
There are two levels of filters available:
- Towards the top of the page, to the right of the Search type and Date filters
- Towards the right of the data table, just below the DATES tab
The filters are really simple to set up and when used, either on their own or in conjunction with one another, can reveal very useful information.
How To Set Up Google Search Console Filters?
To apply a simple data table filter:
- Click on the filter icon in the table and select one of the checkboxes in the pop-up
- On the left of the page, you now have some additional filter options
- Choose one of the options
- Add a criteria for the filter (this is dependent upon the filter you chose in step one)
- Click the blue DONE button
The filter has now been applied to your data.

5 Google Search Console Filters To Capture More Website Traffic
So now that you know how to apply filters to the data, what filters can be applied to show you have to improve your ranking?
1. Good position but low CTR
A really important element of SEO is writing attention-grabbing page titles and meta descriptions that people want to click on.
To identify whether you need to look again at some of your titles and descriptions, apply the following filter:
- Impressions: Greater than 200 (this number will vary by date duration and popularity of your website)
- Position: Smaller than 10
- CTR: Smaller than 3 (this number will vary according to industry)
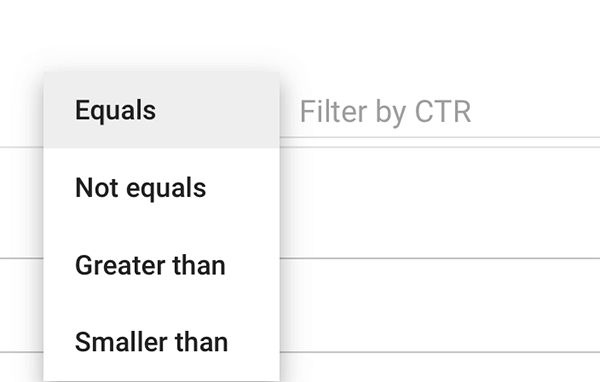
This will show you search terms for which you rank on the first page but have a relatively low CTR.
You can also adjust the number of impressions to ensure that you’re only looking at search terms that drive a decent amount of traffic.
This suggests that the call to action of your page title and/or meta description is not compelling enough to get users to click on your link in the search engine results page (SERP).
Key Actions
- Try re-writing the page title and meta descriptions and check again in a month or so to see whether the CTR has improved
2. High CTR search terms with good impressions but not on first page
Whilst that sounds a bit of a mouthful, if you want to know what search terms are working well for you, that aren’t just people searching for your business or brand name, try the following:
- Sort table by CTR
- Top queries: Does not contain “enter your business name”
- Impressions: Greater than 200 (this number will vary by date duration and popularity of your website)
- Position: Greater than 10
This will show search terms, which are not your business name, that have a good CTA but do not yet feature on the first page of Google.
Key Actions
- As these search terms convert well for you, it would be worth putting some additional effort into those pages that feature these keywords – especially is the position is between 10-15, as they are just off the first page and getting them onto the first page could make a huge difference.
3. Filter by page
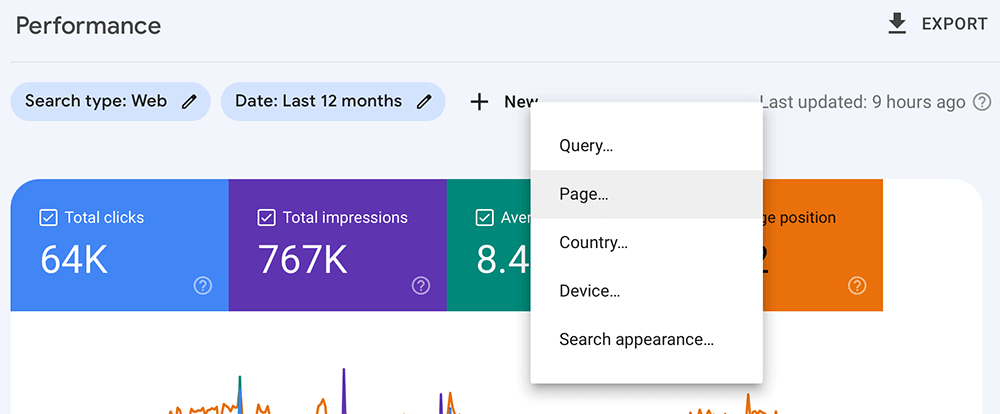
In addition to filtering the data using the tools on the table, you can also create additional top-level filters by adding a filter at the top of the page by clicking on the New link to the right of the Search type and Date filter icons.
If you want to examine which search terms drive traffic to an individual page, as the first step in optimising the contents of that page, then follow the steps below:
- Click on the + New filter option towards the top of the page
- Select Page from the pop-up menu
- Select Exact URL
- Enter the address of the page you want to examine
- Click Apply
You’ll now see the search terms that drive traffic to that individual page.
Key Actions
- You can then apply either of the filters above on the table data and apply the same actions to give the page an SEO Boost
4. Local search terms
You may find that you’re asking very poorly for some search terms that you’d wish to target. However, if you were to filter by Country and further by your location as a Query then if you’re a local business targeting local customers, then you should focus your efforts around local SEO.
- Click on the + New filter option towards the top of the page
- Select Country from the pop-up menu
- Select United Kingdom
- Click on the + New filter option again
- Select Query
- Select Queries containing
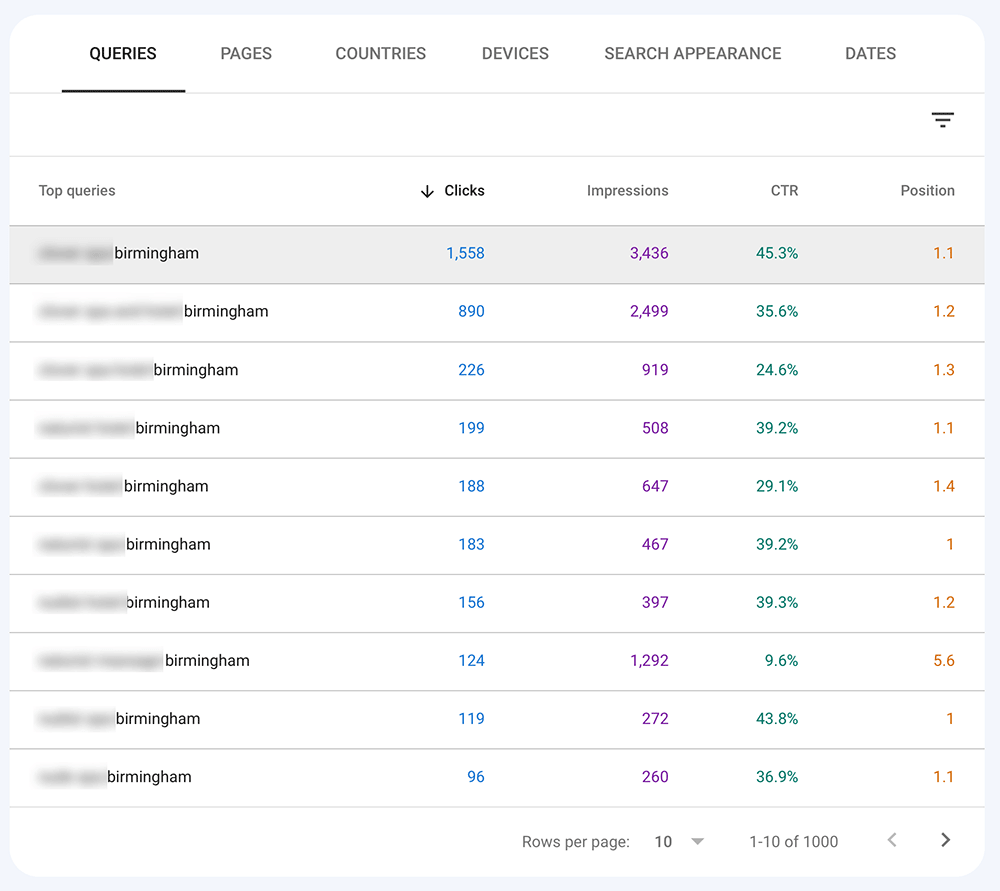
- Add your location eg: Birmingham
- Click Apply
You should now see all the tables in the data below, filtered by your location and not UK-wide or global search results.
With these more localised results, you should see a much stronger CTA and better Position.
Key Actions
- You can then apply either of the top two filters above on the table data and apply the same actions to give the page an SEO Boost for your local area
5. Compare Filter
When you’ve worked your way through some of these filters, established what needs doing and made the required changes, you’re going to need to see if the data has improved.
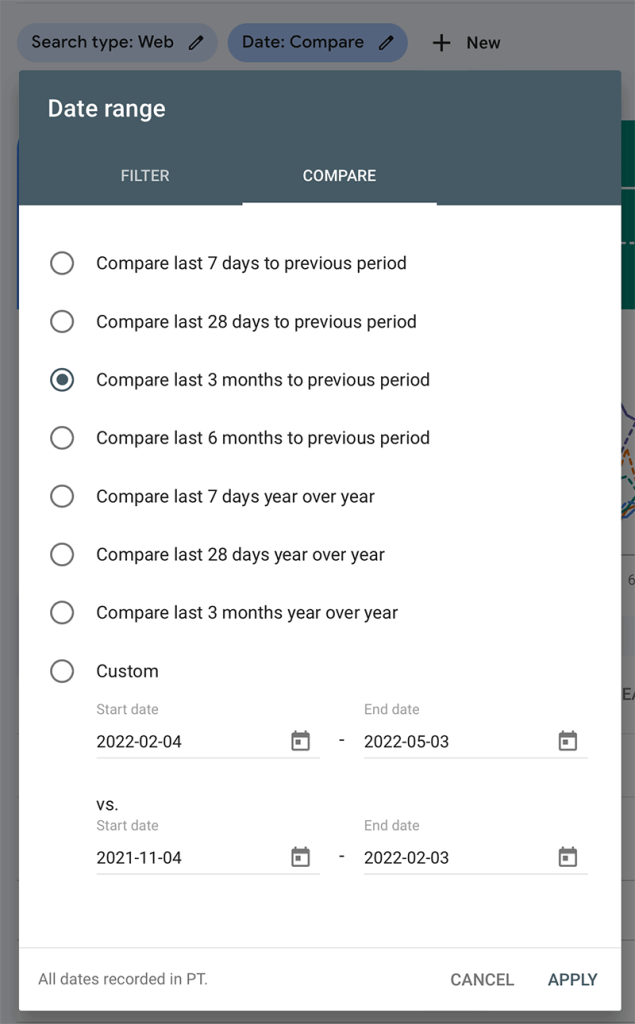
For this comparison, you will have to use the Date: Compare filter.
- Click the blue Date icon towards the top of the page
- Click on the COMPARE option, next to FILTER
- Select a period of time to compare
- Click Apply
You may now run any of the other filters and view the difference between the two time periods.
This will work on all the table data.
Key Actions
- Compare the difference in the data and assess whether the changes you have made to your website have worked or not
- Where the changes have made a positive impact, roll those changes out to other low-performing pages and rinse and repeat
Conclusion
Google Search Console’s Performance report is a really useful tool for analysing your website’s search traffic data. By combining the various filters available, you can quickly and simply identify SEO opportunities to improve the rank of your website.
What is key, is that after making your changes, you monitor the results and continue to do so on a regular basis. In doing so, you’re giving your website the best possible chance of success.


